Sasha and Amanda are great cooks/bakers. Sasha (& Dan) make a really delicious breakfast egg dish. They made it for Easter morning. I believe they got it from the Meyers, Dan’s parents. Amanda has brought, on several occasions a Buffalo Chicken Dip recipe from Mount Joy, Pennsylvania that her family makes. It’s delicious! Both Amanda’s Mom and her Mom, Amanda’s Grandma Betty, are great cooks/bakers too. Her Grandma Betty has done the baking for her grandchildren’s weddings.
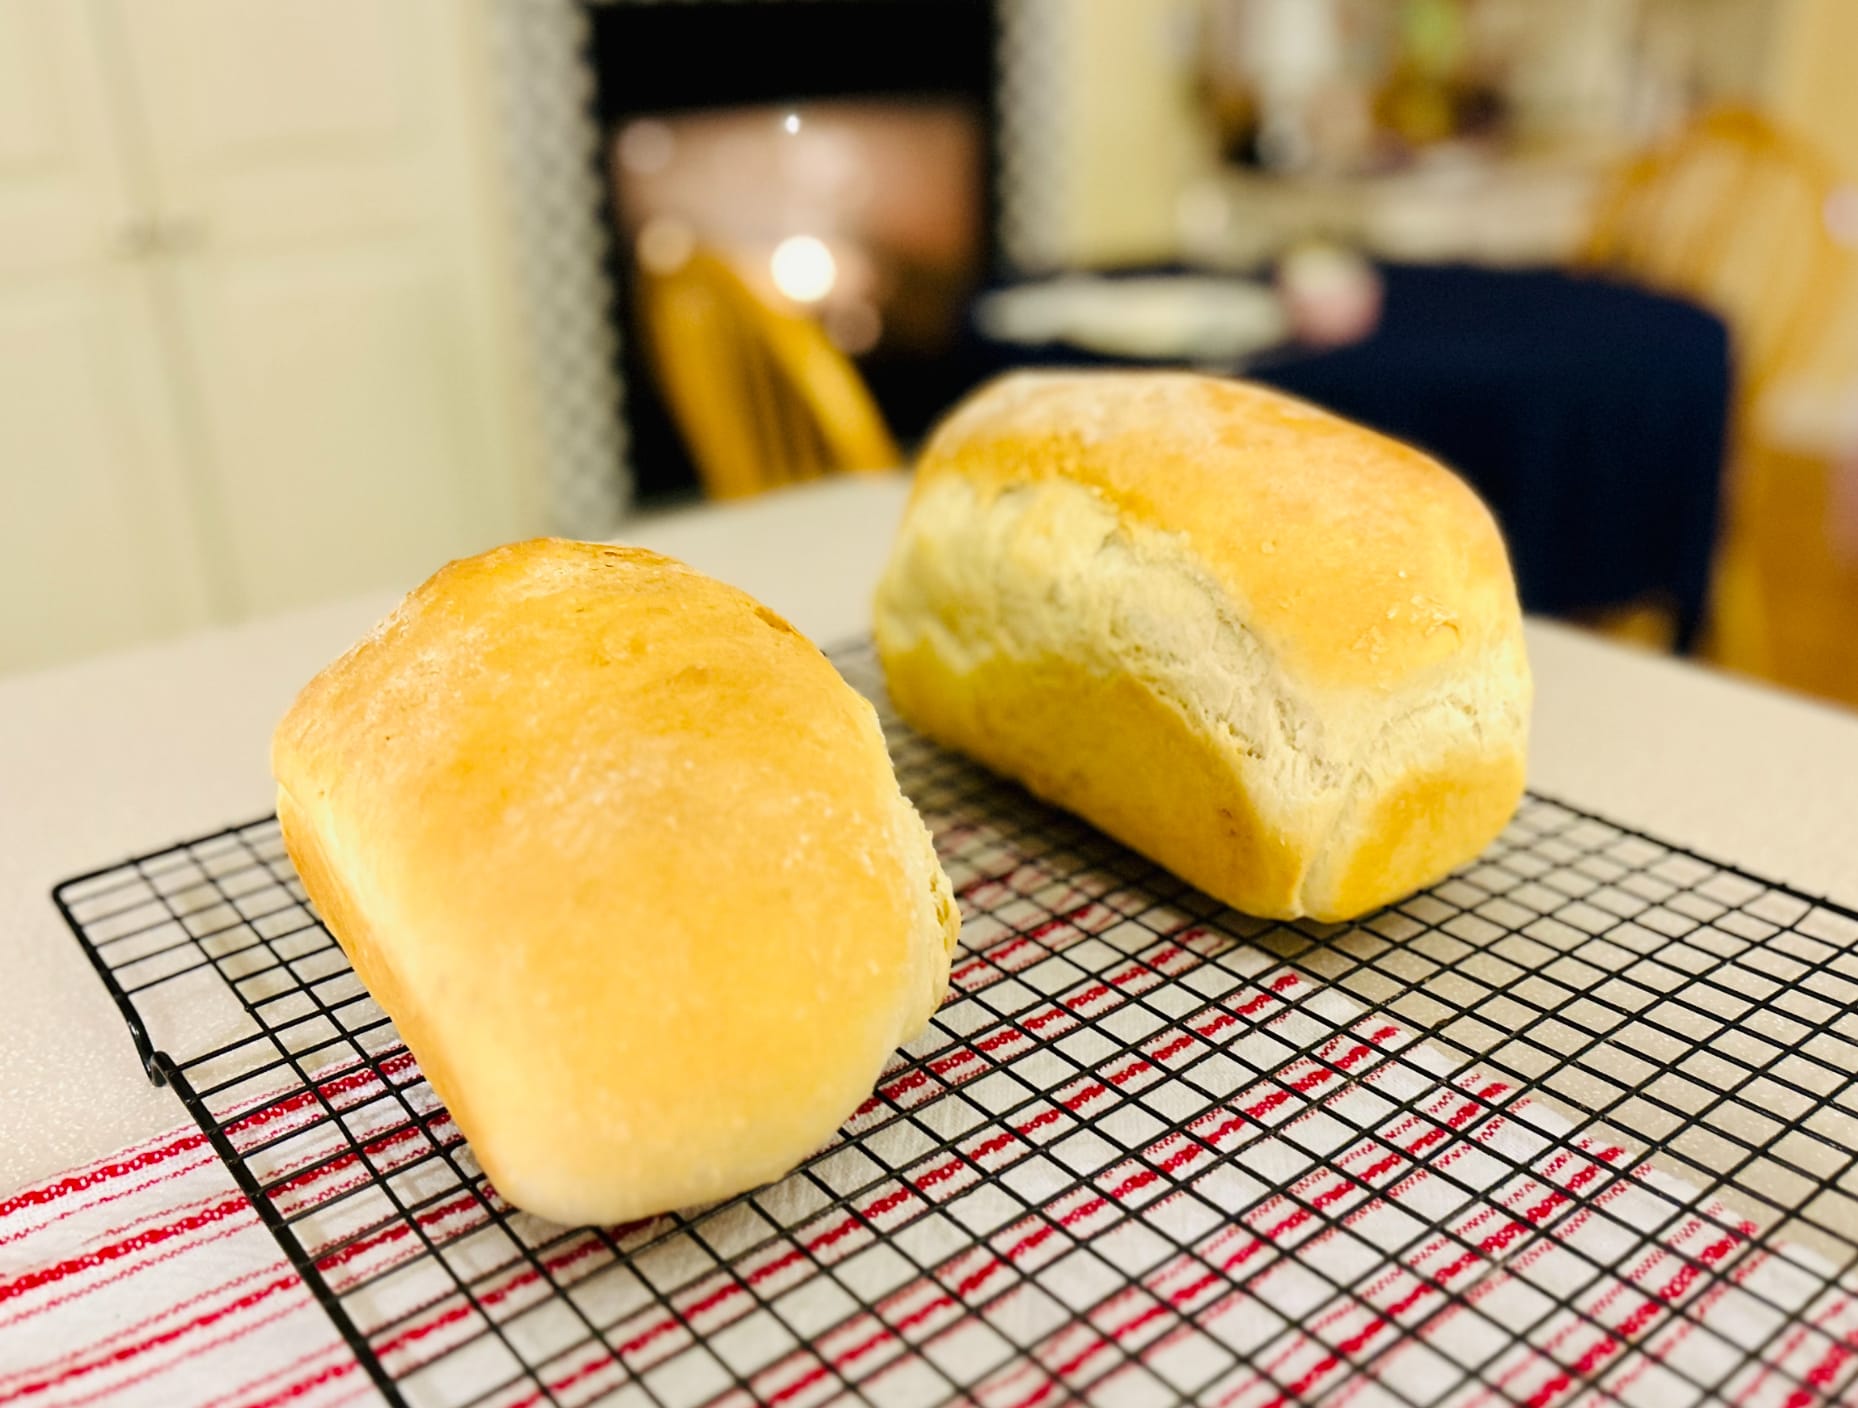
Isn’t it fun, as your family expands, to try, and enjoy new recipes and traditions from other families? Here is another one of Amanda’s recipes, her basic bread recipe. She makes the dough in the bread machine, let’s it rise and then puts it in loaf pans, lets it rise again and then baked in the oven. Sasha and I both agree that Amanda’s Basic Bread Recipe is the BEST we have tasted. I have been over at her house when the kids see it come out of the oven and they get very excited and come running. The twins don’t yet understand that you need to wait a few minutes before you slice it. To see the look on their face when their Mommy hands them a piece is precious. I have seen them devour a piece or two. No doubt, this recipe will be one of those recipes that will be enjoyed for years to come and many Great Days in our family. 🍞
There is a modification for this recipe if you do not have a bread machine, using a stand mixer like a Kitchen Aid. Here’s what I’ll say about a Bread Machine, vs. not using one. Bread can be tricky to make. If the conditions aren’t right (as in temperature, yeast is out of date) you can get a recipe that doesn’t rise as it should or doesn’t rise at all. This can be extremely frustrating when you have taken the time, bought the ingredients and it doesn’t turn out. With a bread machine, that is less likely to happen. The machine carefully controls the temperature and kneading. I could count on less than the fingers on one hand how many times my bread has not turned out. I really just used the bread machine for kneading/proofing/rising. At that time I take out the bread, shape it, place into a pan or on a baking sheet and bake. The negative of a bread machine is that it is one more kitchen appliance to store and if you don’t use it often, you could regret it. If you are considering buying one, consider borrowing one from a friend, who doesn’t use theirs, and see if it is something that would be of value to you. I have the Cuisinart and prior to this one I had the Breadman and when mine started to go, my Mom gave me hers. When we have a party or I am doing lots of baking of bread, I have all three going. If you think you’ll use one after borrowing your friend’s, off to buy it from them. Possibly check Poshmark, FB market place or Kohl’s, use a coupon for additional savings and of course, there’s always Amazon. On your stand mixer, use your bread hook attachment for bread making. Kitchen Aid includes this attachment with their mixers. My thoughts on Bread Machine vs non-bread machine bread use.

Aunt Amanda’s Basic Bread
Ingredients
-1.5c warm water (I heat in the microwave for about 58 seconds)
-3 TBSP sugar
-1 tsp salt
-3 tbsp unsalted butter (quartered and placed in the corners of container-I have also melted butter after heating water in the microwave, both work)
-4 cups all purpose flour
-2 tsp active dry yeast
-Additional butter to butter the two loaf pans
Method
- Place all ingredients in bread machine pan in order listed, sugar, salt, heated water (if melting butter add next) if not melting the butter, add the flour, then the cut butter in the corners. Yeast will be added to the top of the flour. In the newer bread machines, the order matters, liquids NEED to be on the bottom for adequate mixing to occur.
- Turn bread machine to dough mode, which is usually about 1 hour 40 minutes or so.
3. After dough mode, I shape flouring my hands and using a pastry cloth that has a little dusting of flour on it. If you don’t have a pastry cloth, dust a dinner plate with flour, get flour on your hands and shape on the plate into a loaf before putting dough into the buttered pans. let rise in two loaf pans for 40-50 minutes depending on kitchen temp. Sometimes the dough doubles in bulk in less time. When making bread, temperature in the kitchen can make a difference. I have had bread rise in closer to 45 minutes one day and another day it’s closer to 30 minutes. After placing dough in buttered loaf pans, I cover with plastic wrap and let rise under the hood lights on the oven. I have also let rise near a sunny window. At this time I preheat the oven to 350 degrees. If you’ll be using your stove top while bread is rising, makes sure that the rising bread/plastic wrap is far enough away from the flame. Sounds silly to mention but accidents can happen. BE MINDFUL:)
4. When dough has completed rising, I place in the preheated oven, setting timer for 35 minutes. Check after 30 minutes. Each oven can vary.
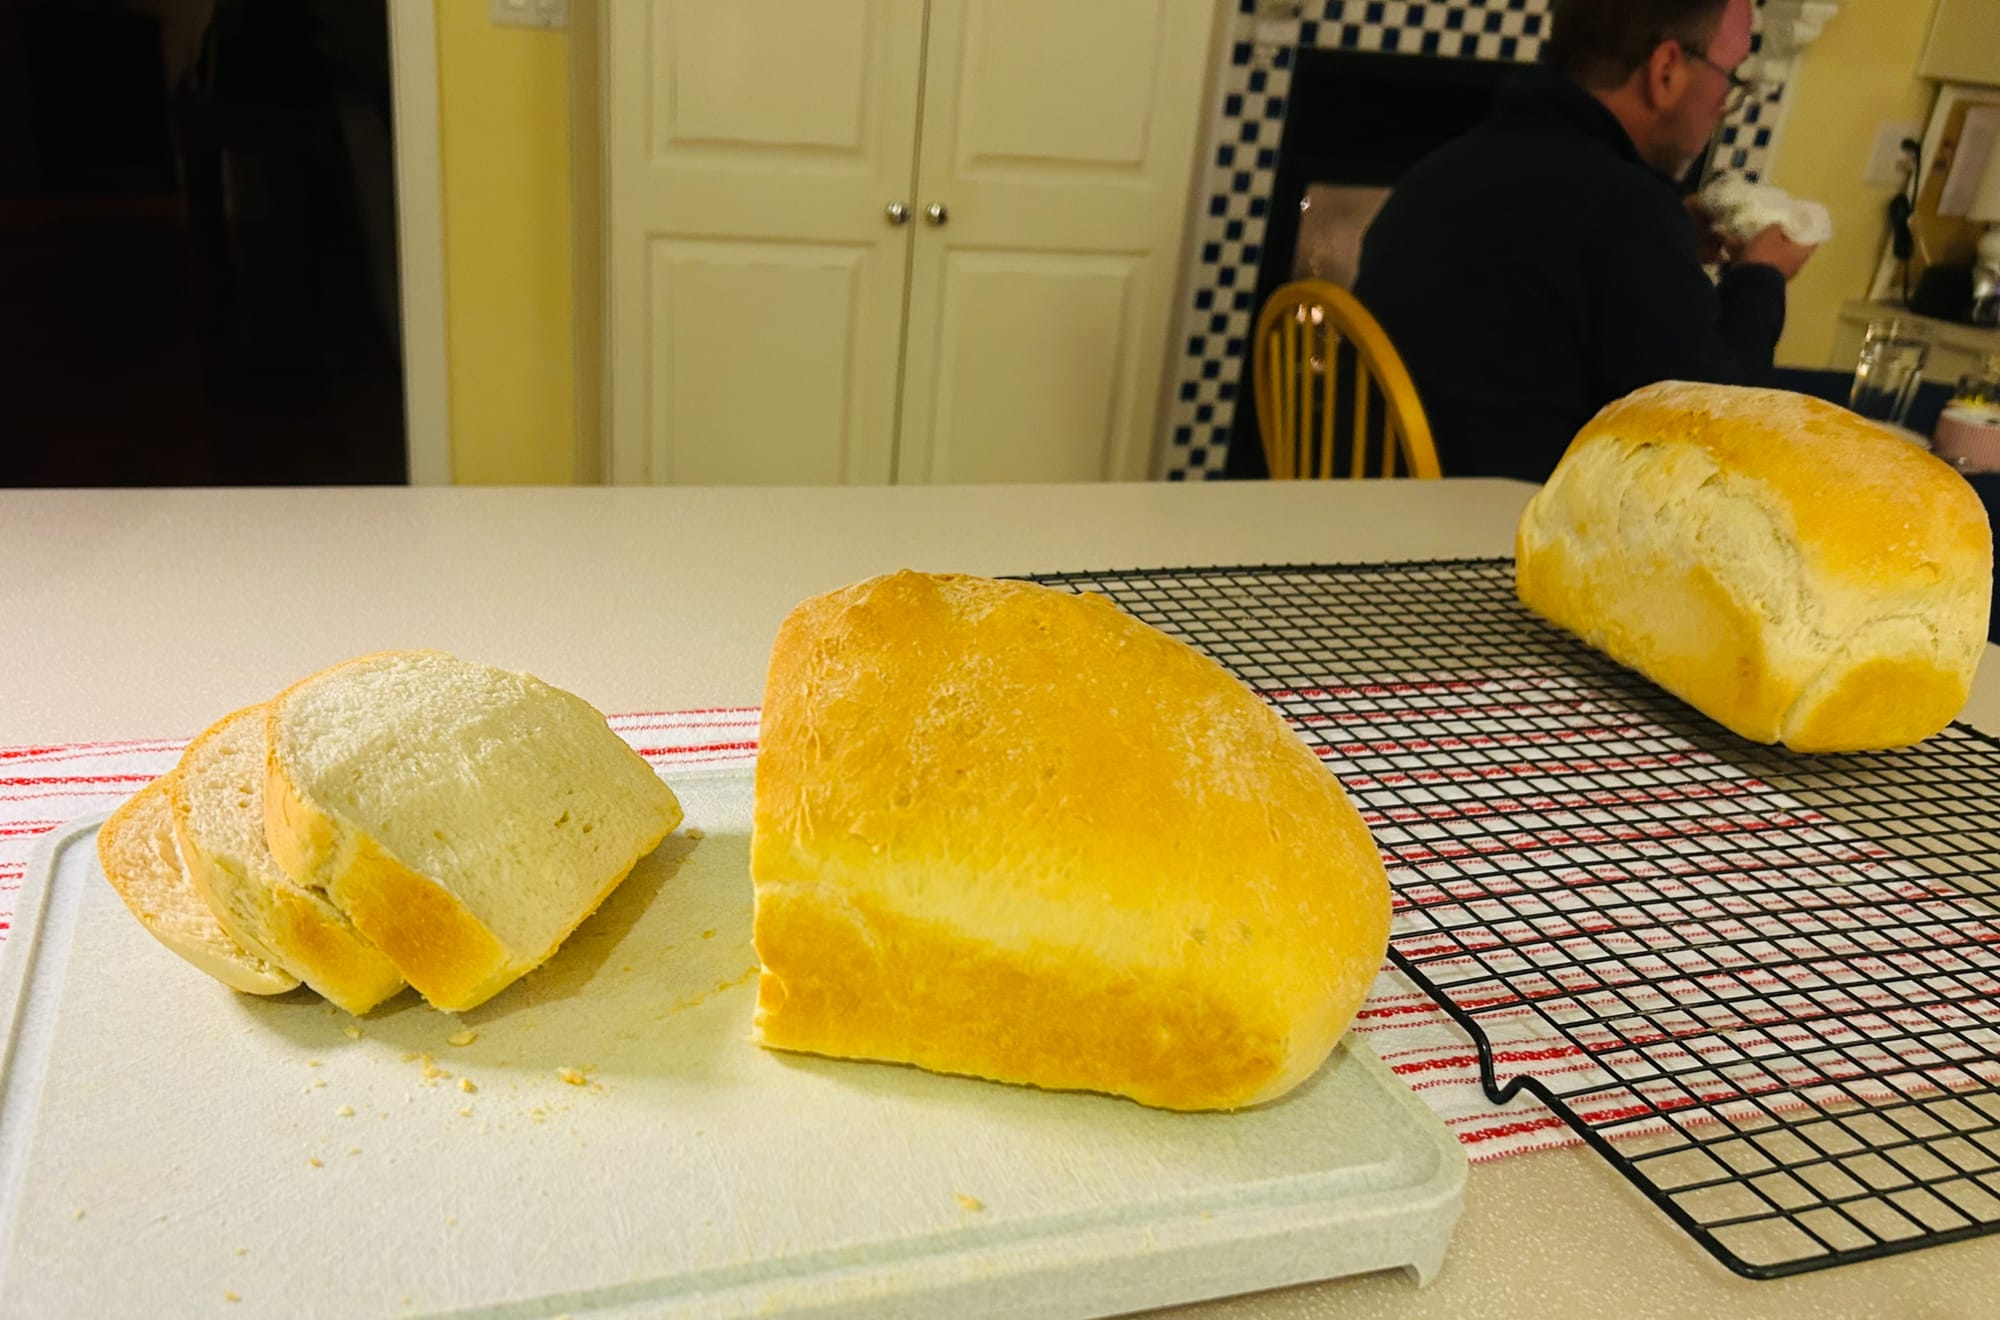
5. When baking is completed, turn out bread loaves onto a baking rack. Wait a few minutes to slice. I store bread in a plastic bag. When I take it to my Mom, I slice it, keep a few pieces out and freeze the rest, sliced in a ziplock freezer bag. This bread also makes great bread crumbs which I also freeze in an air tight ziplock bag. ENJOY!

If You Don’t Have a Bread Maker, Absolutely NOT a Problem. Here is a modification, using your stand mixer. You’ll use same ingredients and amounts…
METHOD:
- Heat your water and unsalted butter in the microwave or on the stove to around 100 degrees which is about the 1 minute or so in the microwave, in a Pyrex/glass measuring cup (like a 2 0r 4 cup measuring cup). Pour warmed water/melted butter in you mixer stand mixing bowl. Let stand for about 10 minutes. Cover bowl with a plate to somewhat keep heat in.
- After the 10 minutes, add the salt and sugar to the mixing bowl and whisk with a fork or whisk.
- Now add about 1/2 cup of your 4 cups of flour and turn mixer on low ( speed 2 on a Kitchen Aid mixer) using your dough hook attachment on your stand mixer. As the first 1/2 cup of flour is incorporated into the mixture, add the remaining 3 1/2 cups of flour about 1/2 of a cup at a time.
- Once all flour has been added, knead on Speed 2 (or low) for about 4 minutes longer or until the dough is smooth and like elastic. The dough will be slightly sticky to the touch.
- Place dough in a bowl ‘greased’ with olive oil. Get some olive oil on the top and turn the dough over so that all of the dough has some oil on it. Cover with plastic wrap and let rise in a warm spot, like under your hood lights on the stove (make sure no burners are on to catch the plastic wrap on fire. If you’ll be using your stove top while bread is rising, make sure that the rising bread/plastic wrap is far enough away from the flame. Sounds silly to mention but accidents can happen. BE MINDFUL:)
- Let the dough rise until about double in bulk, will take about an hour or so. At this time I usually preheat the oven at 350 degrees so that it is hot when I’m ready to bake it.
- Punch dough down and divide in half.
- Shape each half into a loaf and place in 2 buttered 8 ½ x 4 ½ x 2 ½ loaf pans.
- Cover and let rise again in same warm, draft free place till doubled. (about 1 hour).
- Bake at 350 degrees F for about 30 minutes.
- Remove from pans immediately and let cool on wire racks